Setting up Logic in Pro Tools “Smart Tool” mode

It’s not an accident that the “Smart Tool” mode in Pro Tools is so popular and efficient. Smart Tool mode is where the Pointer tool automatically changes to various different tools depending on where you position the mouse on an audio or MIDI region (Left: top, middle, bottom, Right: top, middle or bottom, or bang in the middle of a region). Logic can automatically select between Grabber, Trim, Loop, Fade and Marquee tools. Not having to manually change tools speeds things up a lot, especially during editing.

Here’s a way to set up Logic Pro X in a similar way to Pro Tools to gain the benefit of way less tool changes and a more intuitive operation, which should speed up your workflow.

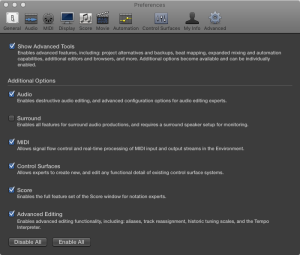
First, set Logic up so it allows three tools instead of two by going to and setting the following Logic Pro X preferences:

Logic Pro X> Preferences> General> Editing>

  • Right Mouse Button> Is Assignable to a Tool. (Creates a tool slot for the Right Mouse Button)

Then in the same preference pane add the automatic assignment of Pointer to the Fade tool when hovering over top left and right of audio regions.

  • Pointer Tool in Tracks Provides: Fade Tool Click Zones.

I used to also set the Marquee tool click zones option, but have now stopped doing this – see the text below the video for a brief explanation why.

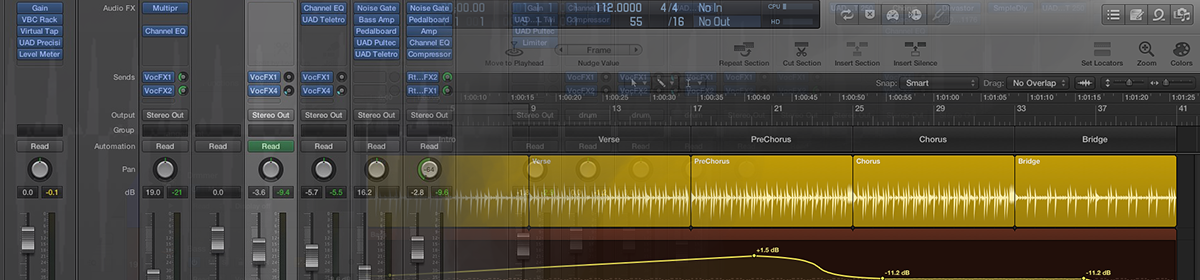
I now set my three tools (at the top of the Main Window) to Pointer, Pencil and Marquee. (Left Mouse, Command-Mouse, Right Mouse).

The minor sacrifice is that the right mouse button is used for the Marquee tool rather than those handy contextual menus. To get the contextual menus, you’ll now have to hold Ctrl and use the left mouse button – which is old-skool Mac techniques from when they only had a single mouse button.

I recommend spending some time learning how to use the Marquee Tool – it’s the equivalent of the Select Tool in Pro Tools and is incredibly powerful once you get your head around it.

Check out my video on the Marquee tool here:

Note that in this video I have “Marquee Tool Click Zones” selected in Logic’s General/Editing preferences (which means Logic Pro automagically switches to the Marquee tool when in the lower third of a MIDI or audio region). To be honest this is very finicky to use when you’re not fully zoomed-in, and can also be prone to accidental selection weirdness happening unless you are. Plus, Apple have recently changed how automation points are selected and edited with the mouse that makes it easier to just have Marquee tool on the right mouse button instead, so I recommend just doing it this way.

Bonus Pro Tools Operation Tip: Open (and enlarge) a Mixer Window (Cmd 2), then you can toggle between them just like in Pro Tools with Cmd = or Cmd ~


Setting Up Logic Pro X

Note: Updated May 2020

One of the big problems – or rather “features” – with Logic is that it’s so customisable. It’s designed to be used by people who have many different interests setting it up in different ways to suit their creative strengths. It’s also been through some quite significant changes over the past few years, with various features added, menus being moved around the place, and completely different default key commands.

Logic even installs with different options depending on whether it’s a new installation or whether you had Logic 9 installed previously.

So all this makes it a little more complex to get up and going for the new user.

With a fresh install, Logic Pro X assumes you are a novice and installs  what appears to be the “GarageBand” defaults. You can tell if you have this option selected if Logic displays wooden sides in the window, just like GarageBand. This version of Logic Pro X is extremely limited in what it can do – there are numerous preferences, functions and menu items missing in this configuration. It really is “GarageBand Pro” in this mode!

You can enable all the cool extra stuff by going into Logic’s preferences and turning on the Advanced Tools. (Logic/Preferences/Advanced Tools).

12_02_16__5_26_PM

I’d turn on everything except Surround unless you specifically need that option. (Adding surround-format Apple Loops can inadvertently change your mixer into Surround Mode).

Now you should have a bunch of extra options in Logic.

I recommend you add three tools to the Main Window (rather than two) and make the right mouse tool the Marquee Tool. See other articles for detail.

Go to Logic Pro X/Preferences/General then Editing tab.

Select drop down: Right Mouse Button: Is Assignable to a Tool

To make things easier for you I’m attaching my personal Key Commands based on a hybrid current Logic key commands and some tweaked Logic 9 key commands. Unzip and put them here: /Users/YOU/Music/Audio Music Apps/Key Commands and then select them by going to the menu: Logic Pro X/Key Commands/Presets and then choosing it.

Zeds Updated 2020 Key Commands

I’m also including a Logic Pro X song template that has my own recommended tweaks that I’ll justify in some follow-up posts. Unzip and put here: /Users/YOU/Music/Audio Music Apps/Project Templates. You’ll find it under “My Templates” when you use Logic’s File/New from Template option.

Song Starter Template Z

And finally, here’s my latest list of recommended Logic Pro X preference and project file tweaks if you feel like matching my setup.

Recommended Setup for Logic X

Welcome to Logic Pro for Smarties.

This site aims to provide tutorials, tips and tricks for using Apple Logic Pro X.

By now, most of us have some idea of how to work computers, and we hopefully have some kind of research skills (even if it’s just being able to Google things). We also love to get to the point. So this site gets to the point as fast as possible so you can get that instant gratification you deserve.